First up, I needed to make another copy of all of the many things decks (see the bookbinding page for that book), which in itself took an unexpectedly long time, since ther eis an unexpectedly large number of them lol. I also decided to make a separate deck for the 13 card and 22 card versions that have those options, to make it easier to draw from the respective decks without needing to sort through individual cards. On a related note, the wonderful people at Wizards of the Coast created a magic item that uses the remainder of a deck of playing cards, the Deck of Miscellany, which conveniently gave me a whole pile of those to be able to sell as well!
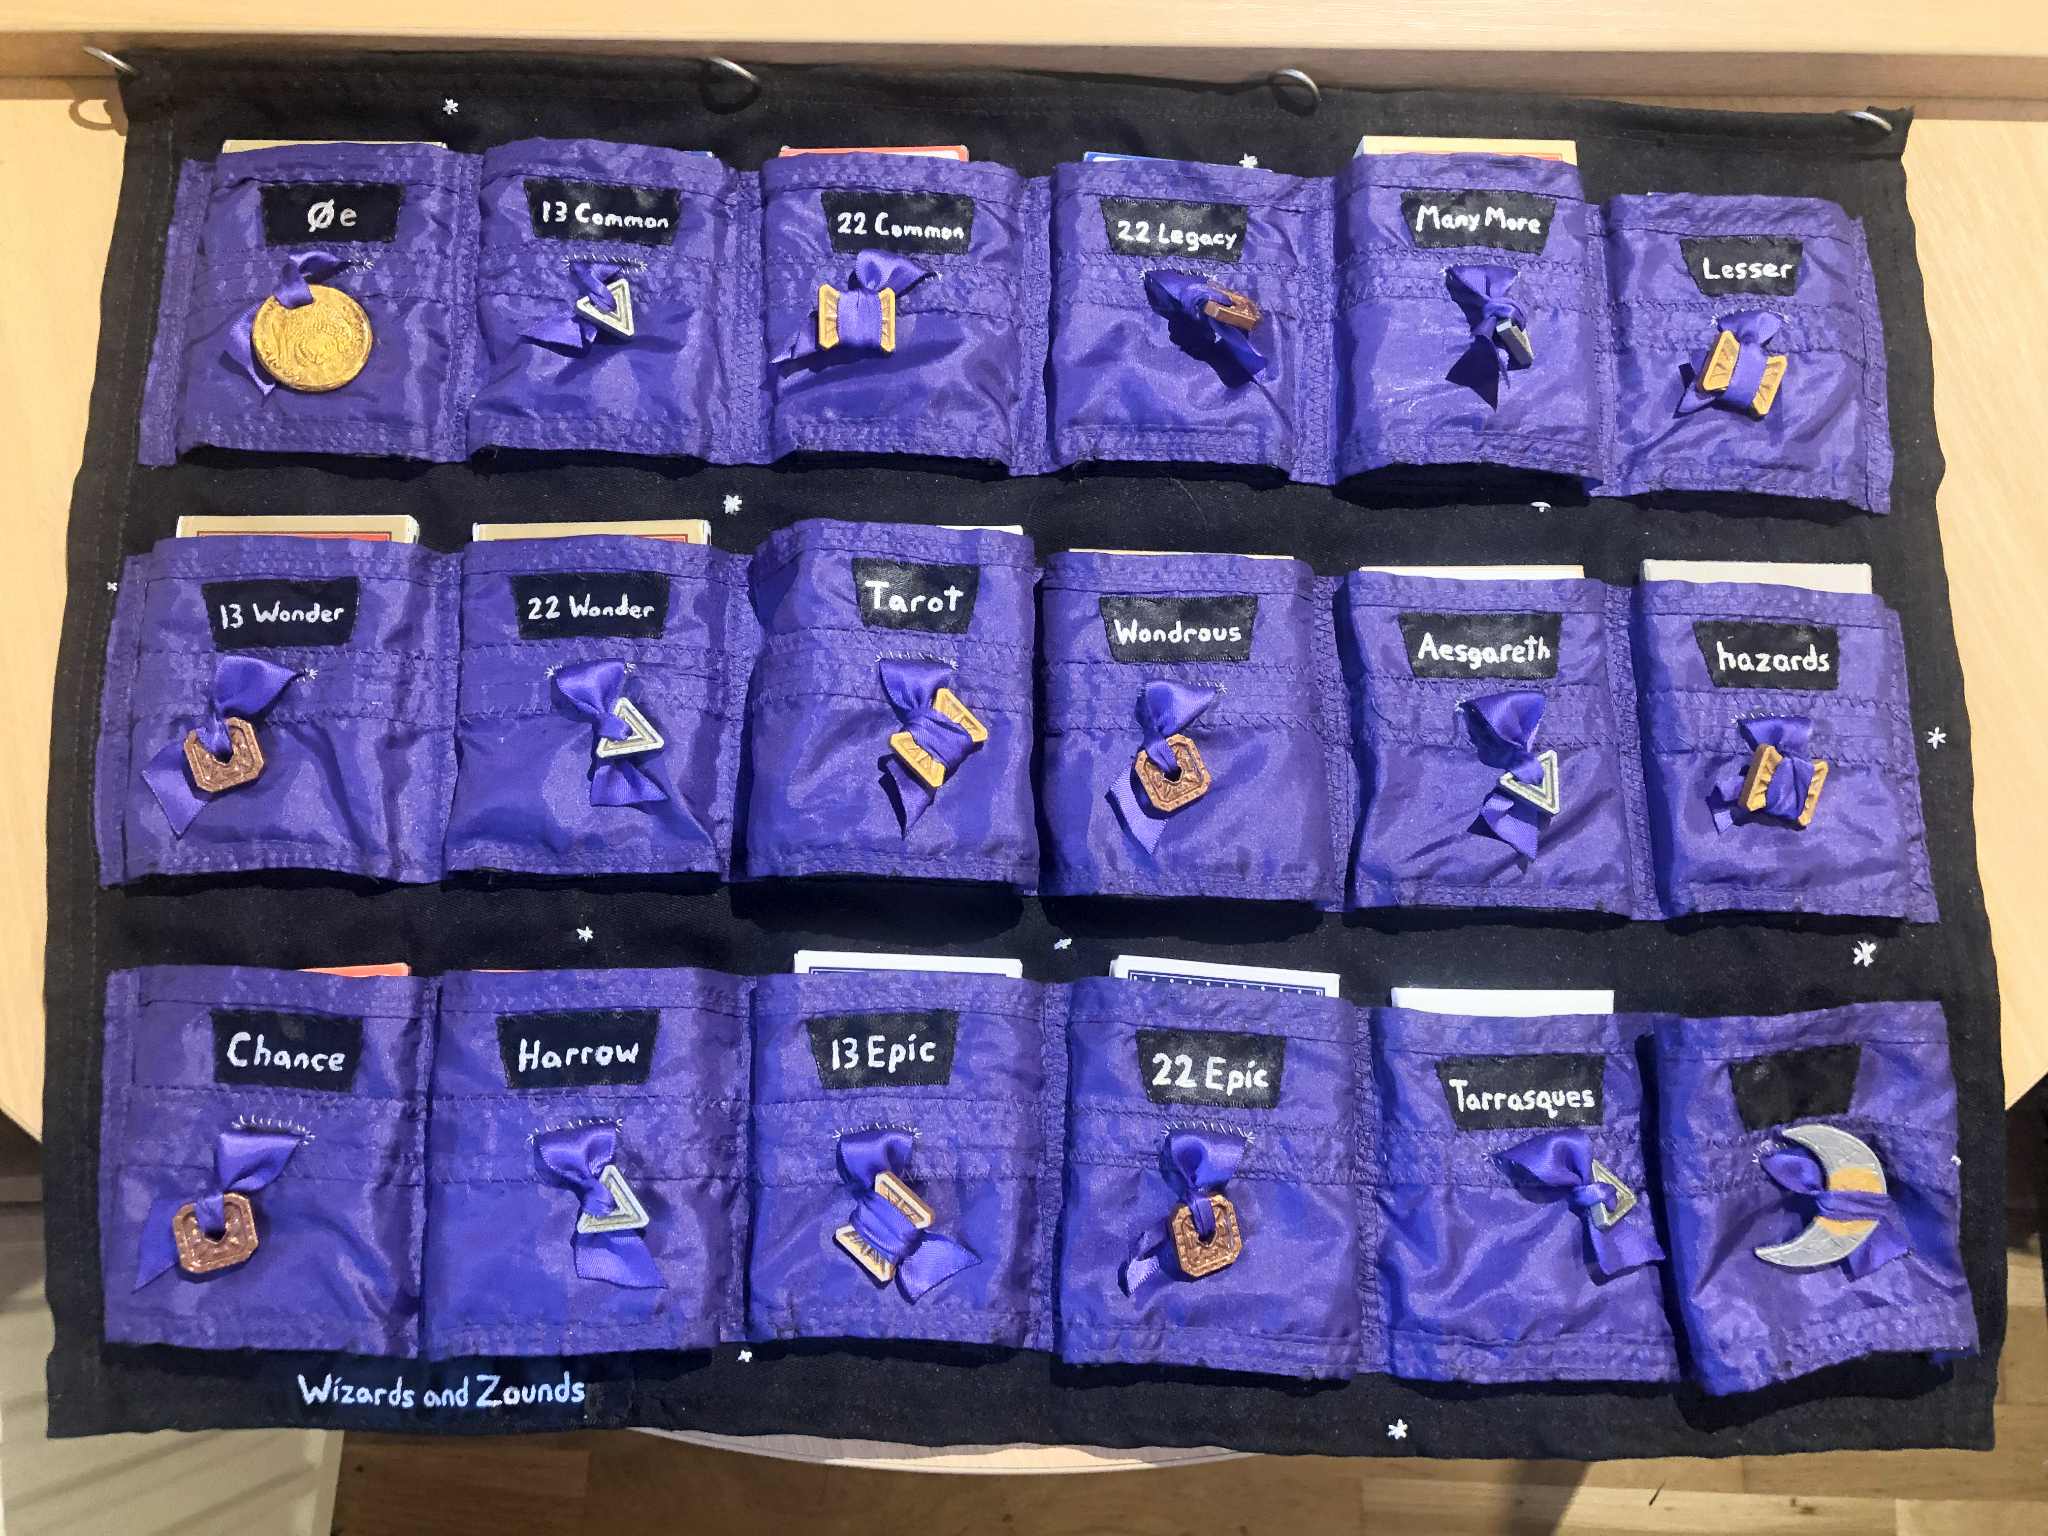
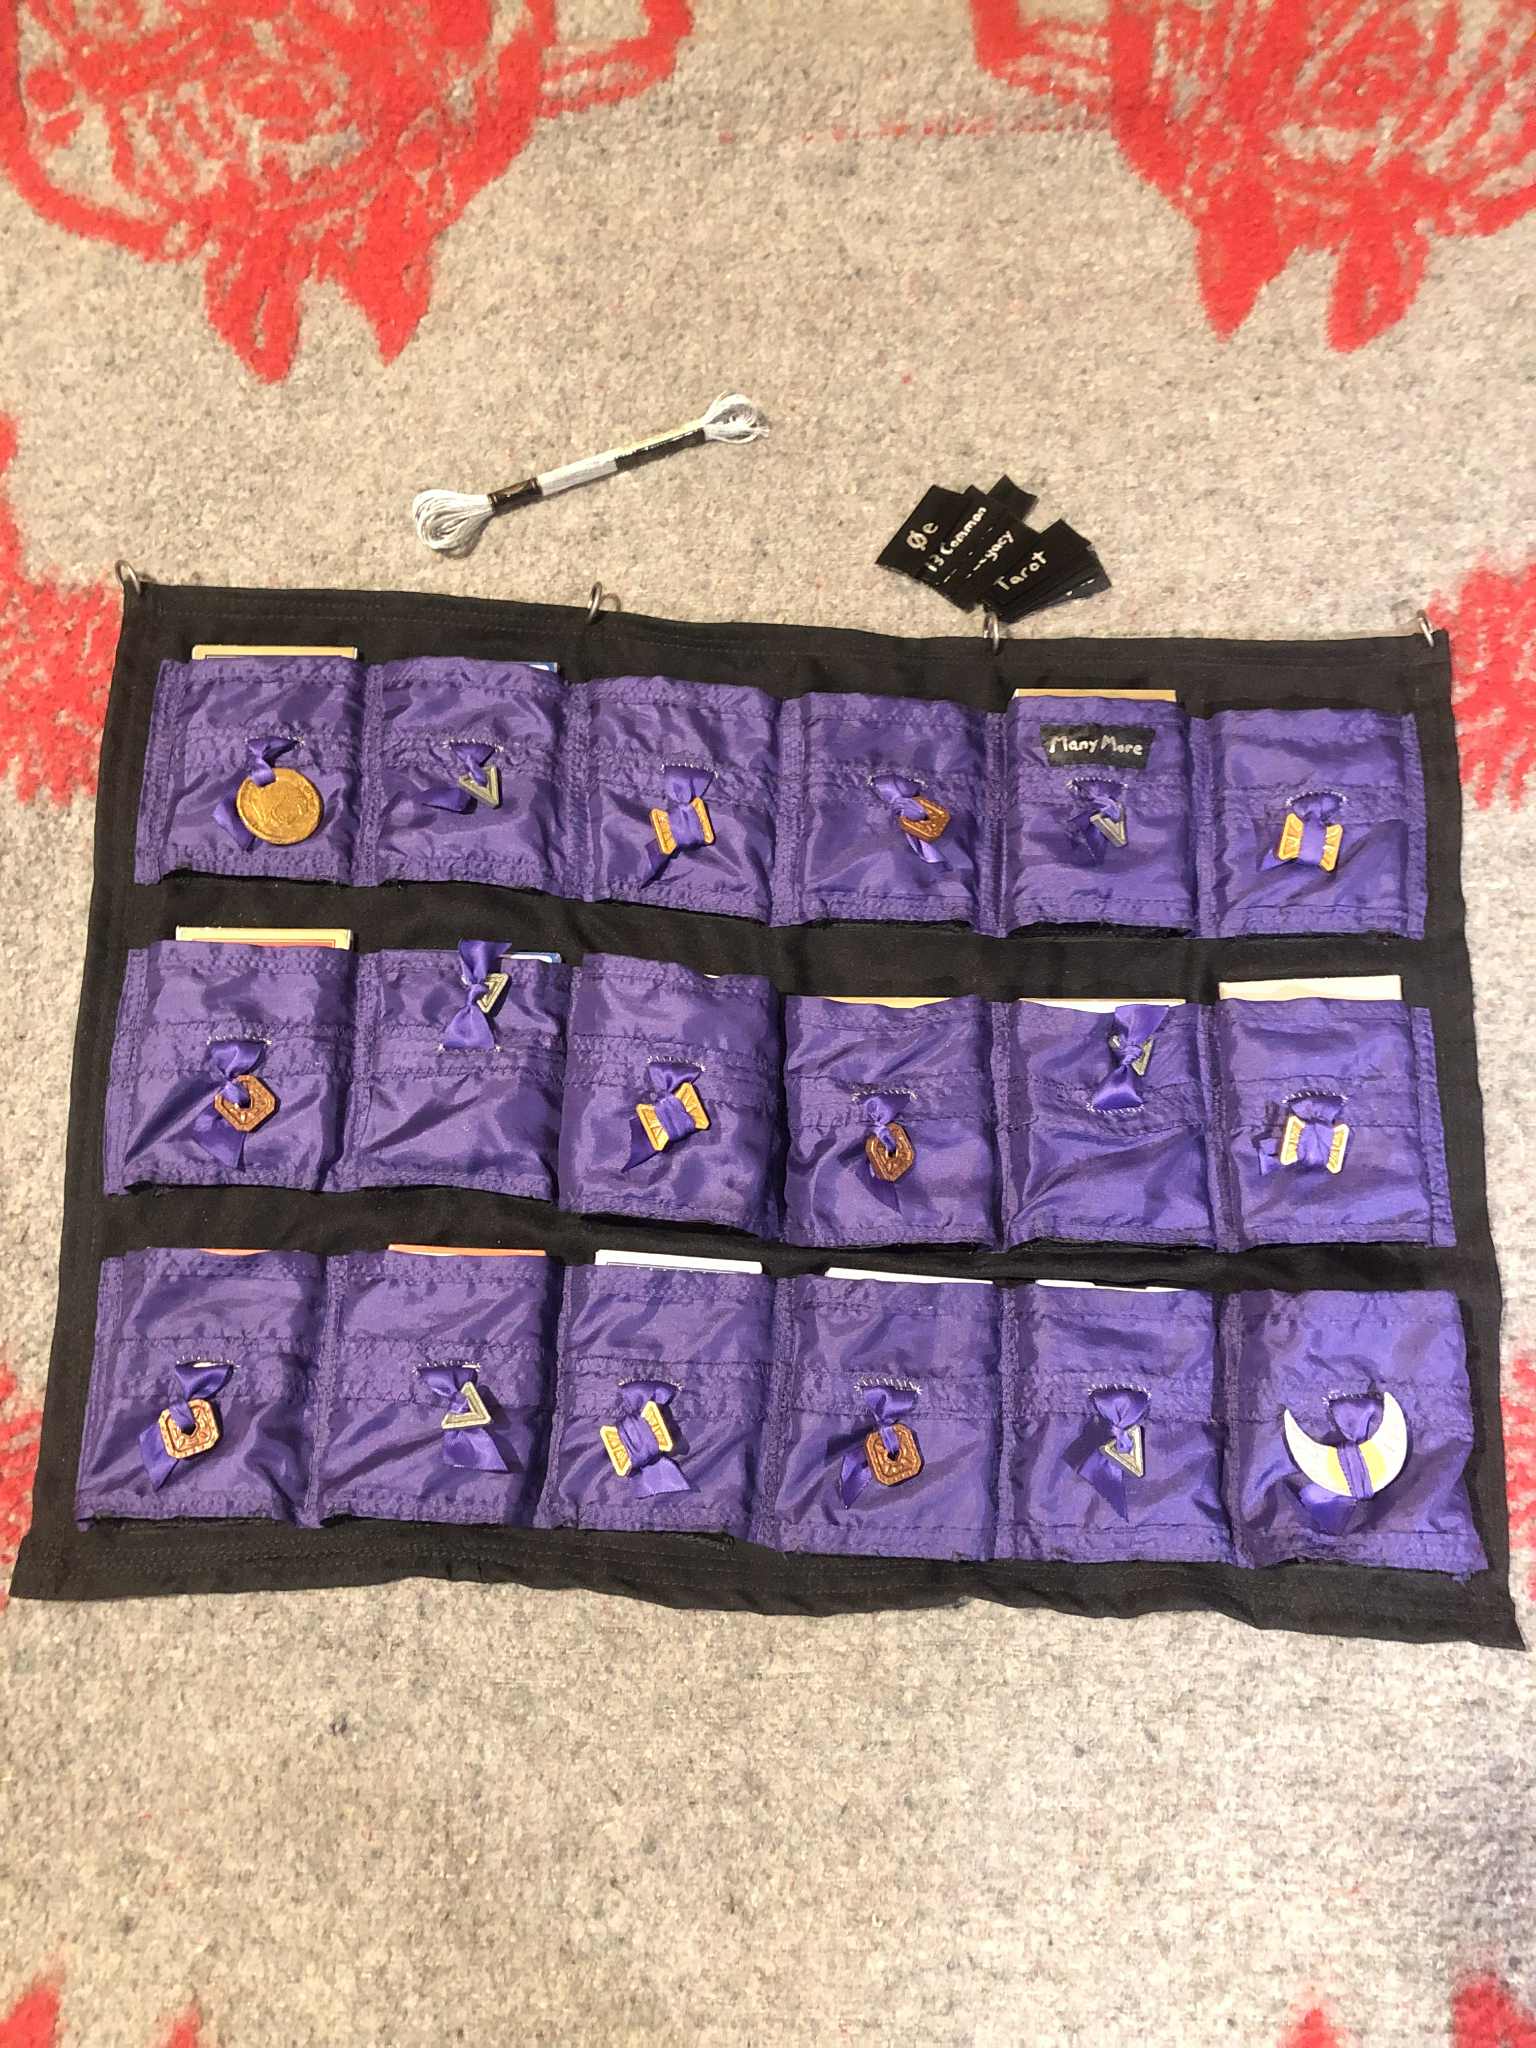
Now on to the sleeve. Sleeves? Pocketsheet. This thing! We had spare purple fabric from the merchant bag, and black fabric from some scrap cloth laying around. I began by making long strips of the purple fabric, wrapping around the edges to prevent fraying, with a triple-layer of itself in a strip near the center for a buttonhole to add a pull ribbon to be able to pop each deck up by tugging on the ribbon, for easy selection and added bling (see later). It seems that there are two "standard" card sizes, one about 3mm wider than the other, so for each we made the pocket able to fit the widest standard size, as each of these will be for sale, and be replaced after each sale. Also taking into account, I needed to sew each pocket size to account for the different thicknesses of decks, since there are vastly different sizes ranging from the 11 card Deck of Chance to the 78 card Tarot of Many Things. We also added some added slack to each with a stack of about 10 cards to avoid the pockets being sewn too tight to slide easily.
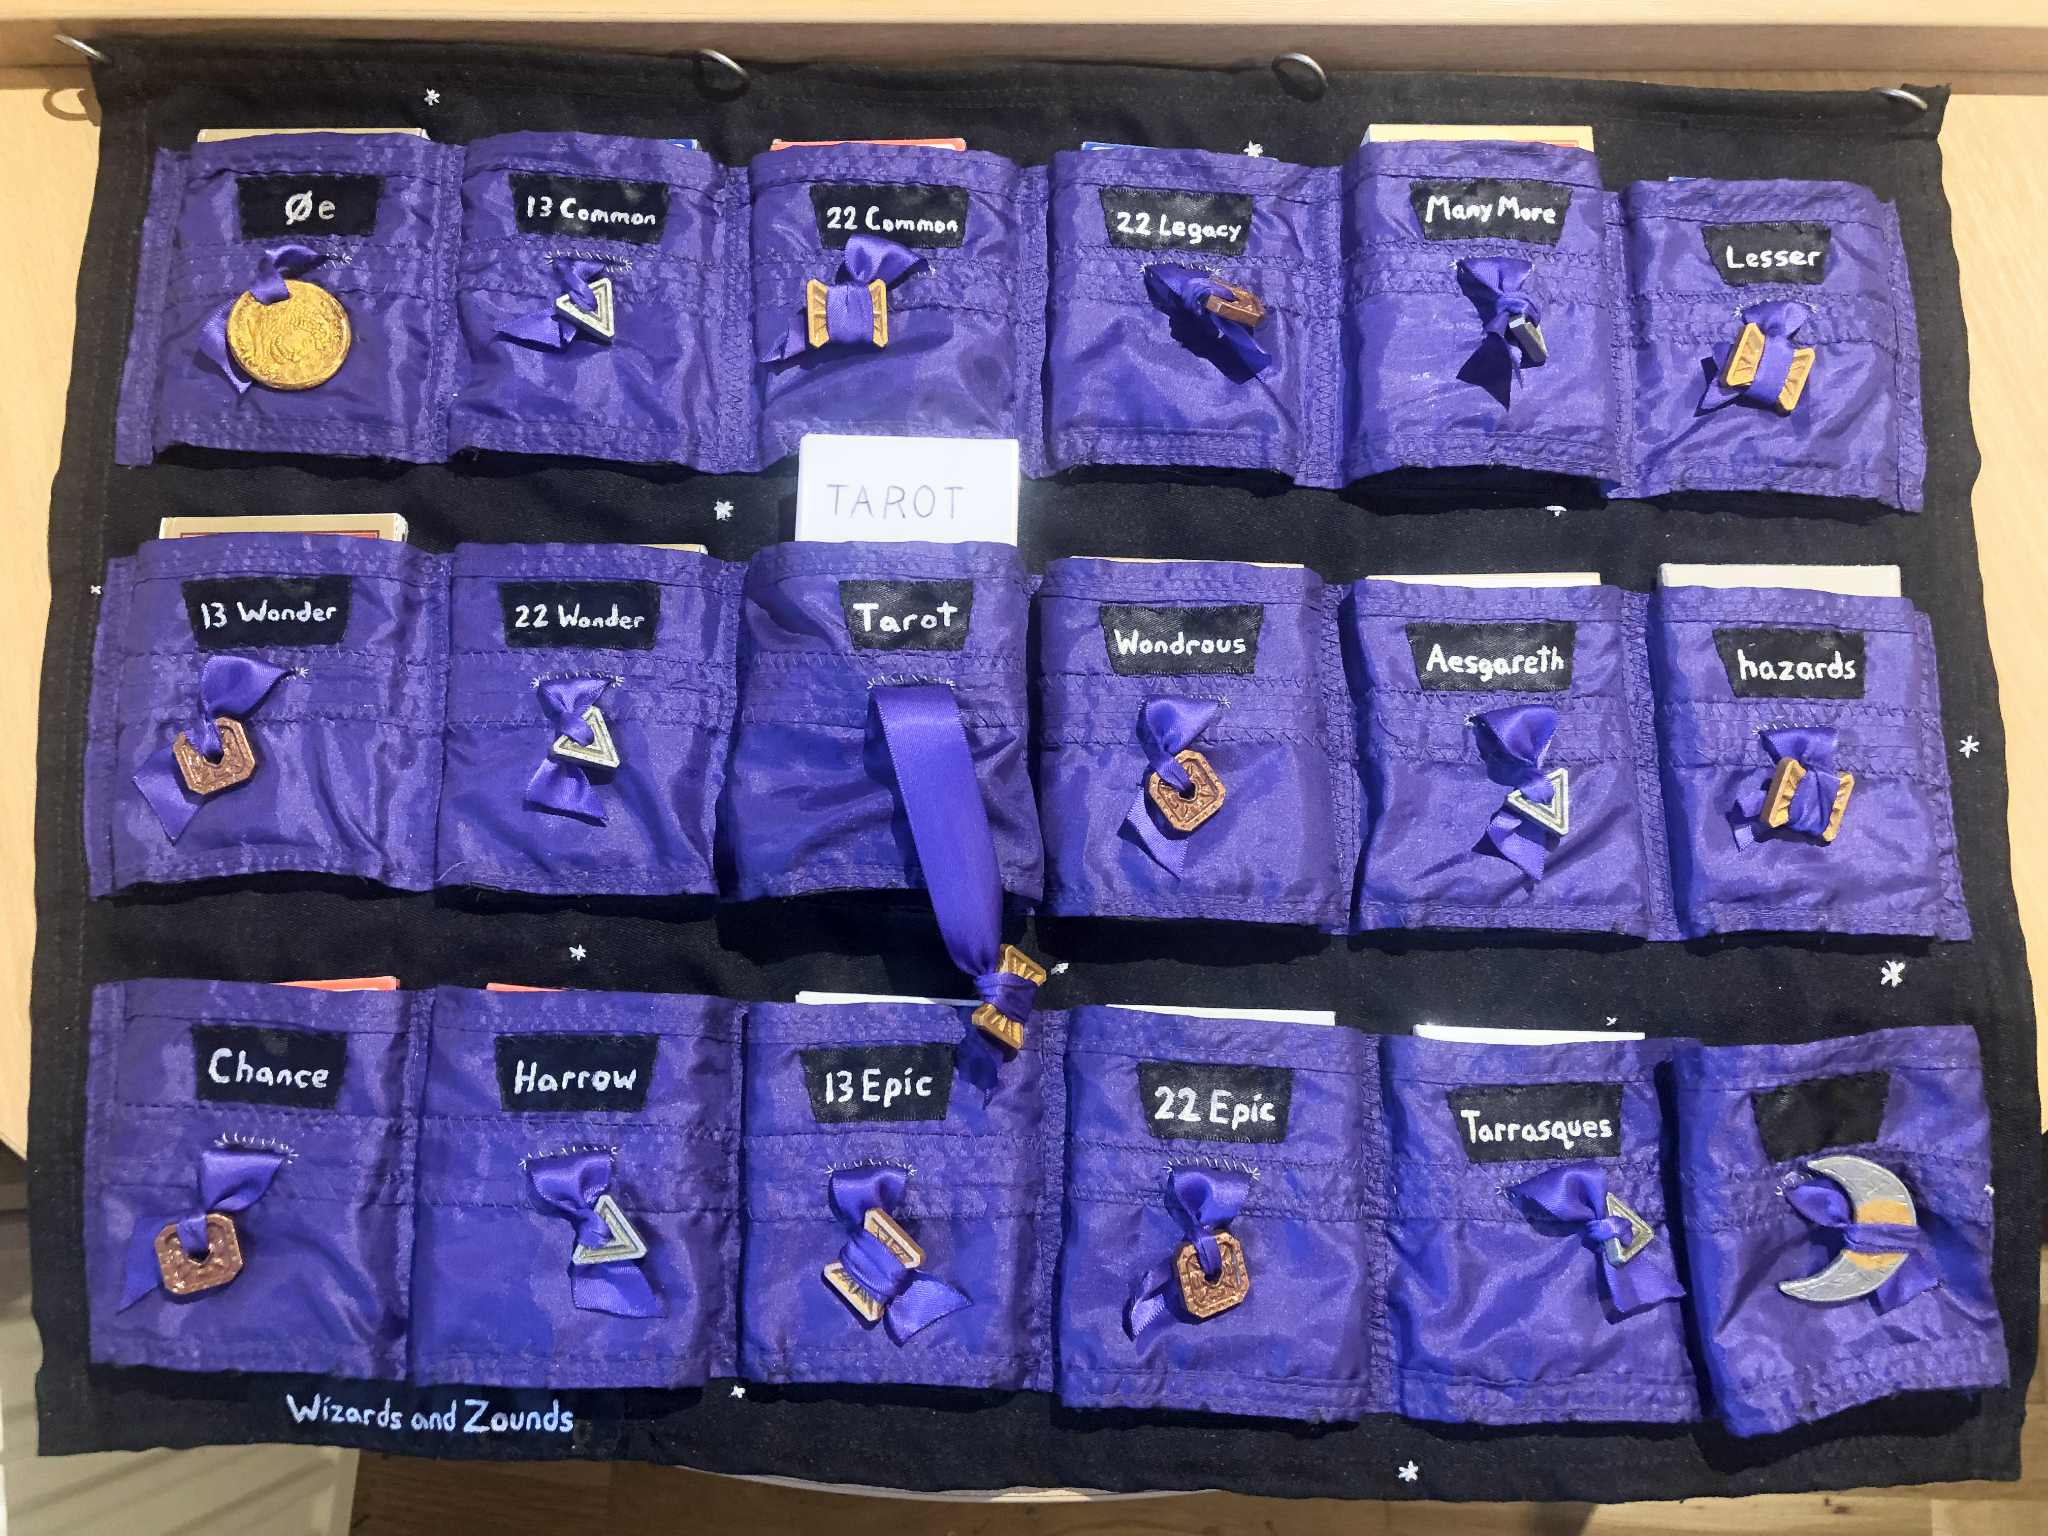
Once I had all of these horozontal purple strips added, after much, much measuring and chalk lines, I created a bottom to each of the pockets with with a wide black ribbon, since the sides of these were all already folded over to not fray, and were of course sized to each deck as needed. Since all of this made for 17 needed pockets, I did three rows of six to give me 18 pockets, the last of which can hold dice or be used for expansion should another deck show up in the future. On that note, I can always combine the 13 and 22 card decks for those respective items into the same pocket should I need further expansion on top of that. Or I suppose add a column of three to the side, or another row underneath, y'know there's plenty of options. In either case, this will do me for a while.
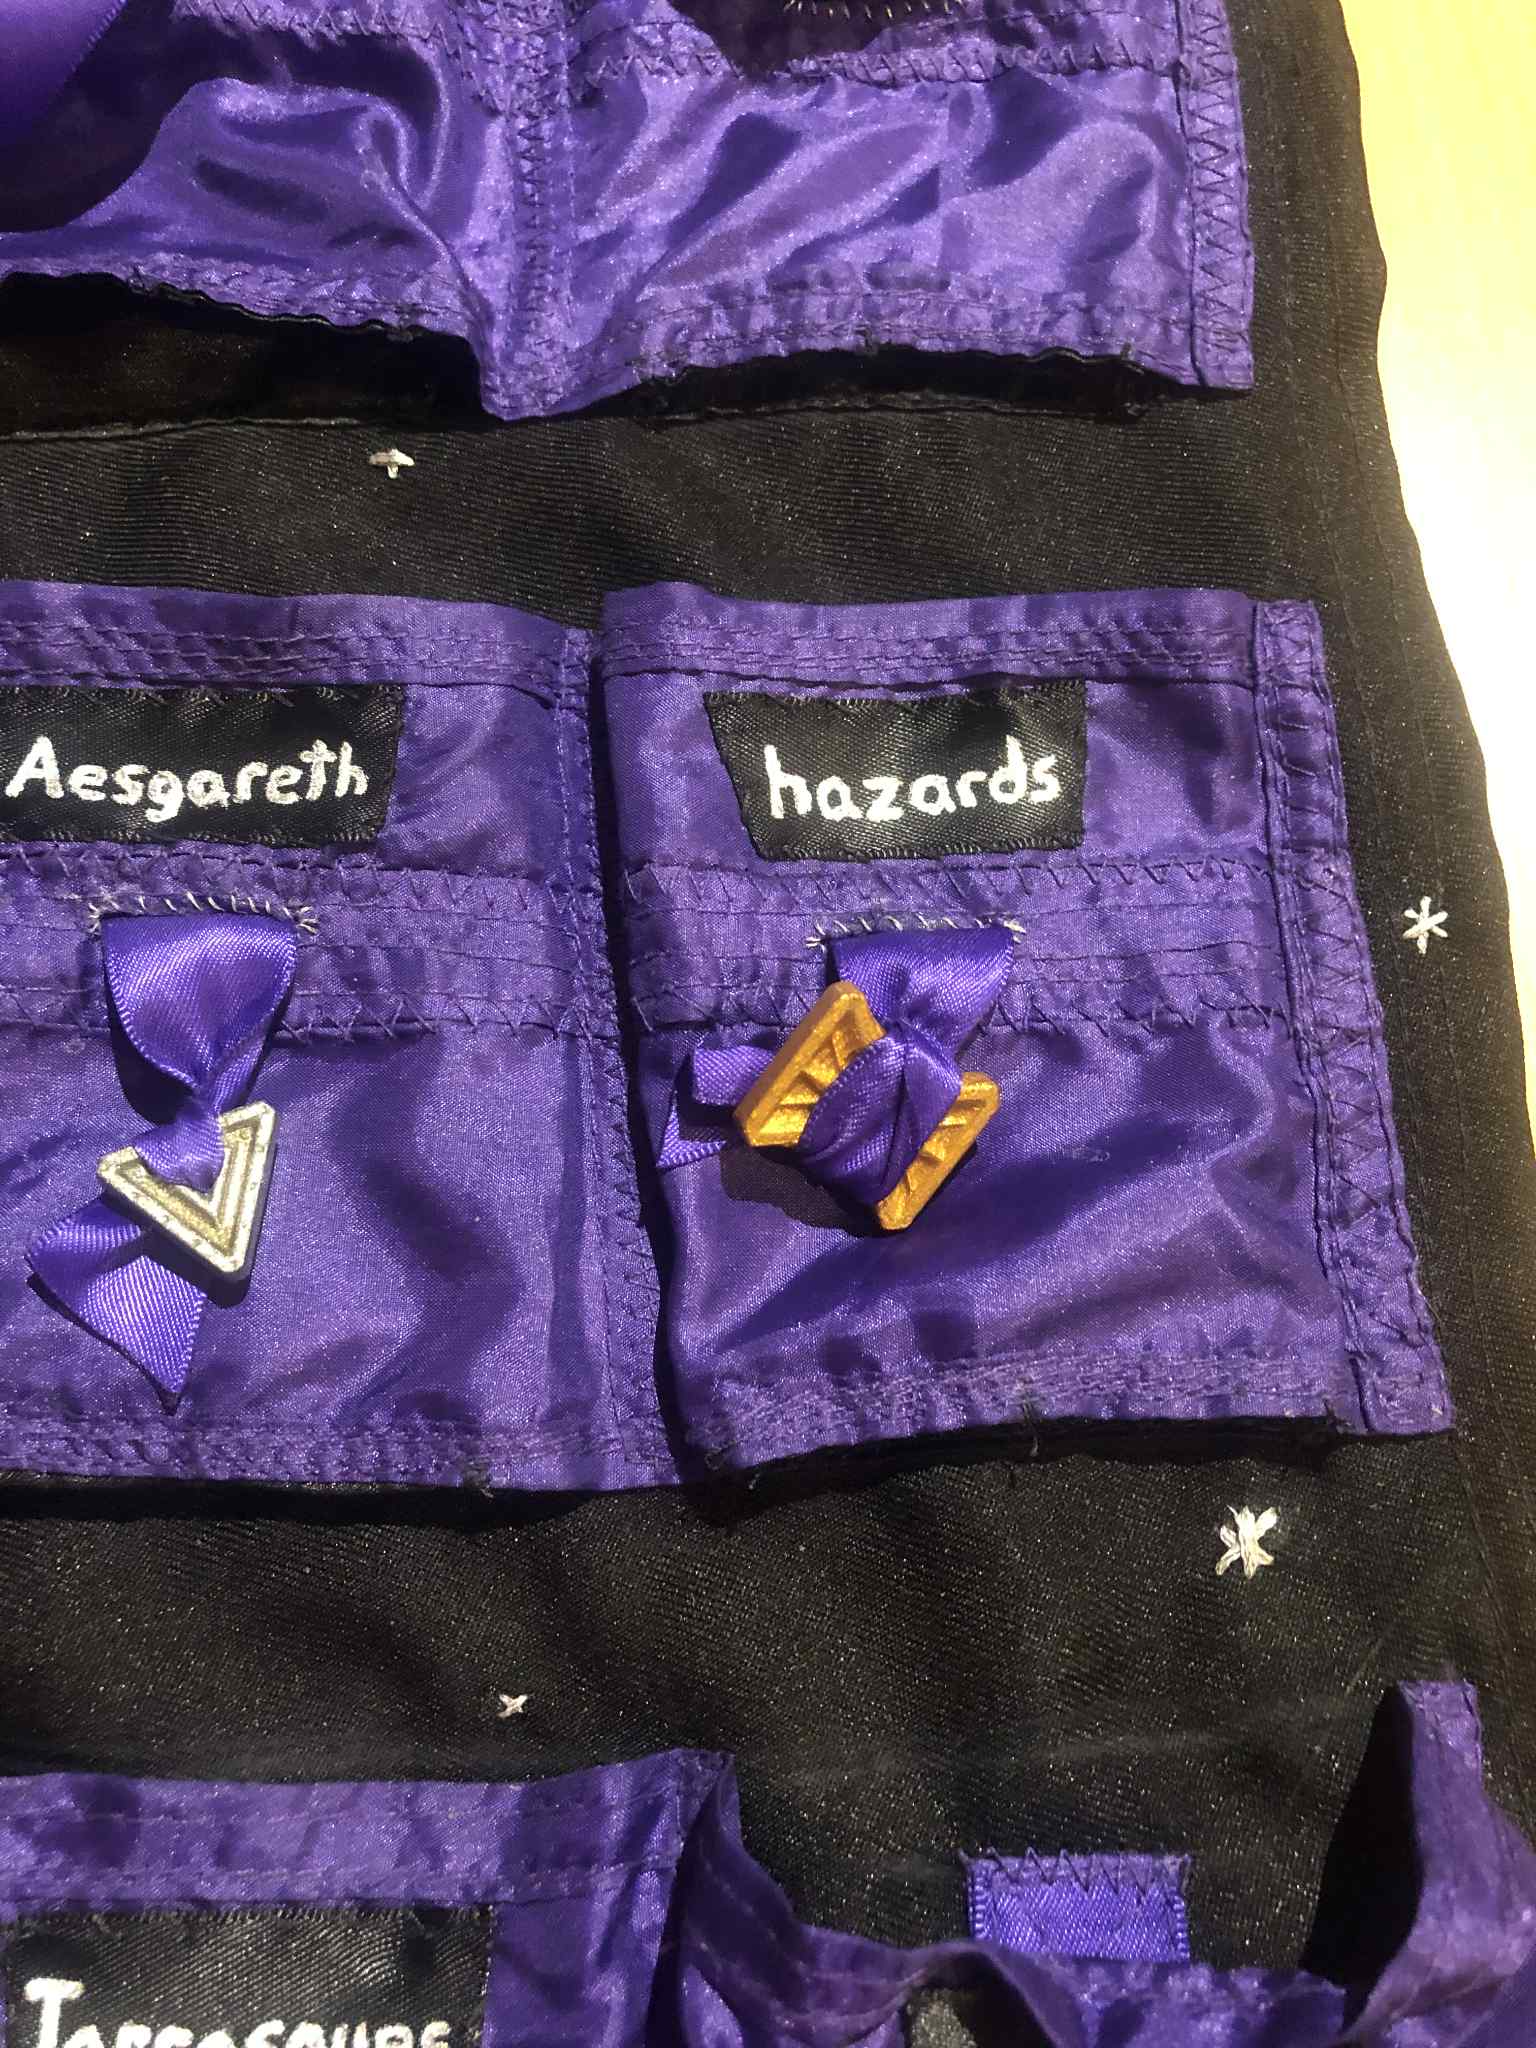
With the pockets now all created, I needed to add the pull ribbons to each pocket. Now, for this I pondered for a while, what kind of decoration could I add to each ribbon to pull on, to add the aformentioned bling. I optioned to myself buttons (meh), kinda little woven loops of woody vine (cool, but potentially breakable once they dry out), and then I thought... coins! Like the obligatory copper, silver, and gold coins! Now, I'd first pondered just getting cheap fake-treasure plastic coins that look like treasure coins, and painting each in the respective colours, but couldn't find any in person in-store. So I thought, since I need to order online for this anyway, I may as well get 3d prints for the canon shapes for the D&D coins! Then I can have alternating copper, silver, and gold coins, with one platinum at the very end!
AND! AND, I could still take one of those plastic treasure coins (I ordered some of those too for this specifically), and make a Thonian gold coin!!! This calls back to Raven's epic quest (YouTube playlist), specifically Temple of the Frog (YouTube video), so we took one of those plastic coins, added a bit of JB Weld around the rim both for strength, and as well to be able to write into the wet epoxy the needed text, Uther Once And Always, and just the empire name Thonia on the back, since that side isn't described. By chance the plastic treasure coins that we found did have the profile of a bearded man, as described of the coin, and so after the JB Weld modification, we painted it gold, and while the text isn't as clean as an actual stamped coin, I'm going to canonically chalk it up to the technology to make them 4000 years ago wasn't as tight as it is today, let's go with that. Not that anyone will really see it, since it'll be behind the shop table, and will only really be seen glanced at a sharp angle as people walk past my booth, so it's just flavour for flavour's sake really. But, a Thonian gold coin!
And then, the 3d printed coins arrived! And there was a... minor problem, comparing it to the D&D coins (ForgottenRealms Fandom). Now, they were advertised as this colour (which I initially didn't even notice), but maybe they did that to avoid issues? I dunno, but I was painting them anyway. So we turned the silver squares bronze, the copper triangles silver (and put a hole in them), the platinum hourglasses gold (with that added circular feature trimmed off), and... well, I don't want to just paint a copper piece platinum. So, we decided to go with the Waterdeep Harbor Moon (ForgottenRealms Fandom), since Raven resides in Waterdeep. Though, smaller, to fit on the cardsleeve. Also, I initially made it... not crescenty enough, so we took some of the initial trimmings (it's made out of like... 6 layers of wooden veneer left over from the Box of Many Things), added a few metal pegs from a safety pin to firmly connect these added... crescent corners we'll call them, and readjusted the shape that way.
I carved the faces of the harbor moon as best I could to the official art, though quite scraggly given I have more larger size carving tools, and the softwood veneer wanting to splinter off if I tried anything smaller, but we managed. One face has a castle in the middle, with winged griffon in a very basic sense, and the other side with two ships, one being pulled under by giant tentacles, and that's mostly recognizable. Given where it will be attached, this will do me quite well. Also it felt quite sturdy thanks to the plywood with high quality wood glue style construction. I added a bit of white to the gold and silver to make it platinum with an electrum inlay (any whiter and it just didn't look metallic any more, but it is noticeably lighter, and matches the official art well), and we gave the entirety of the coins three layers of topcoat, and gave it a solid week to fully dry before attaching them to the decksheet/cardslot/sheetsleeve/slotsheet/decksleeve/cardpocket..., and then considered how to label the pockets.
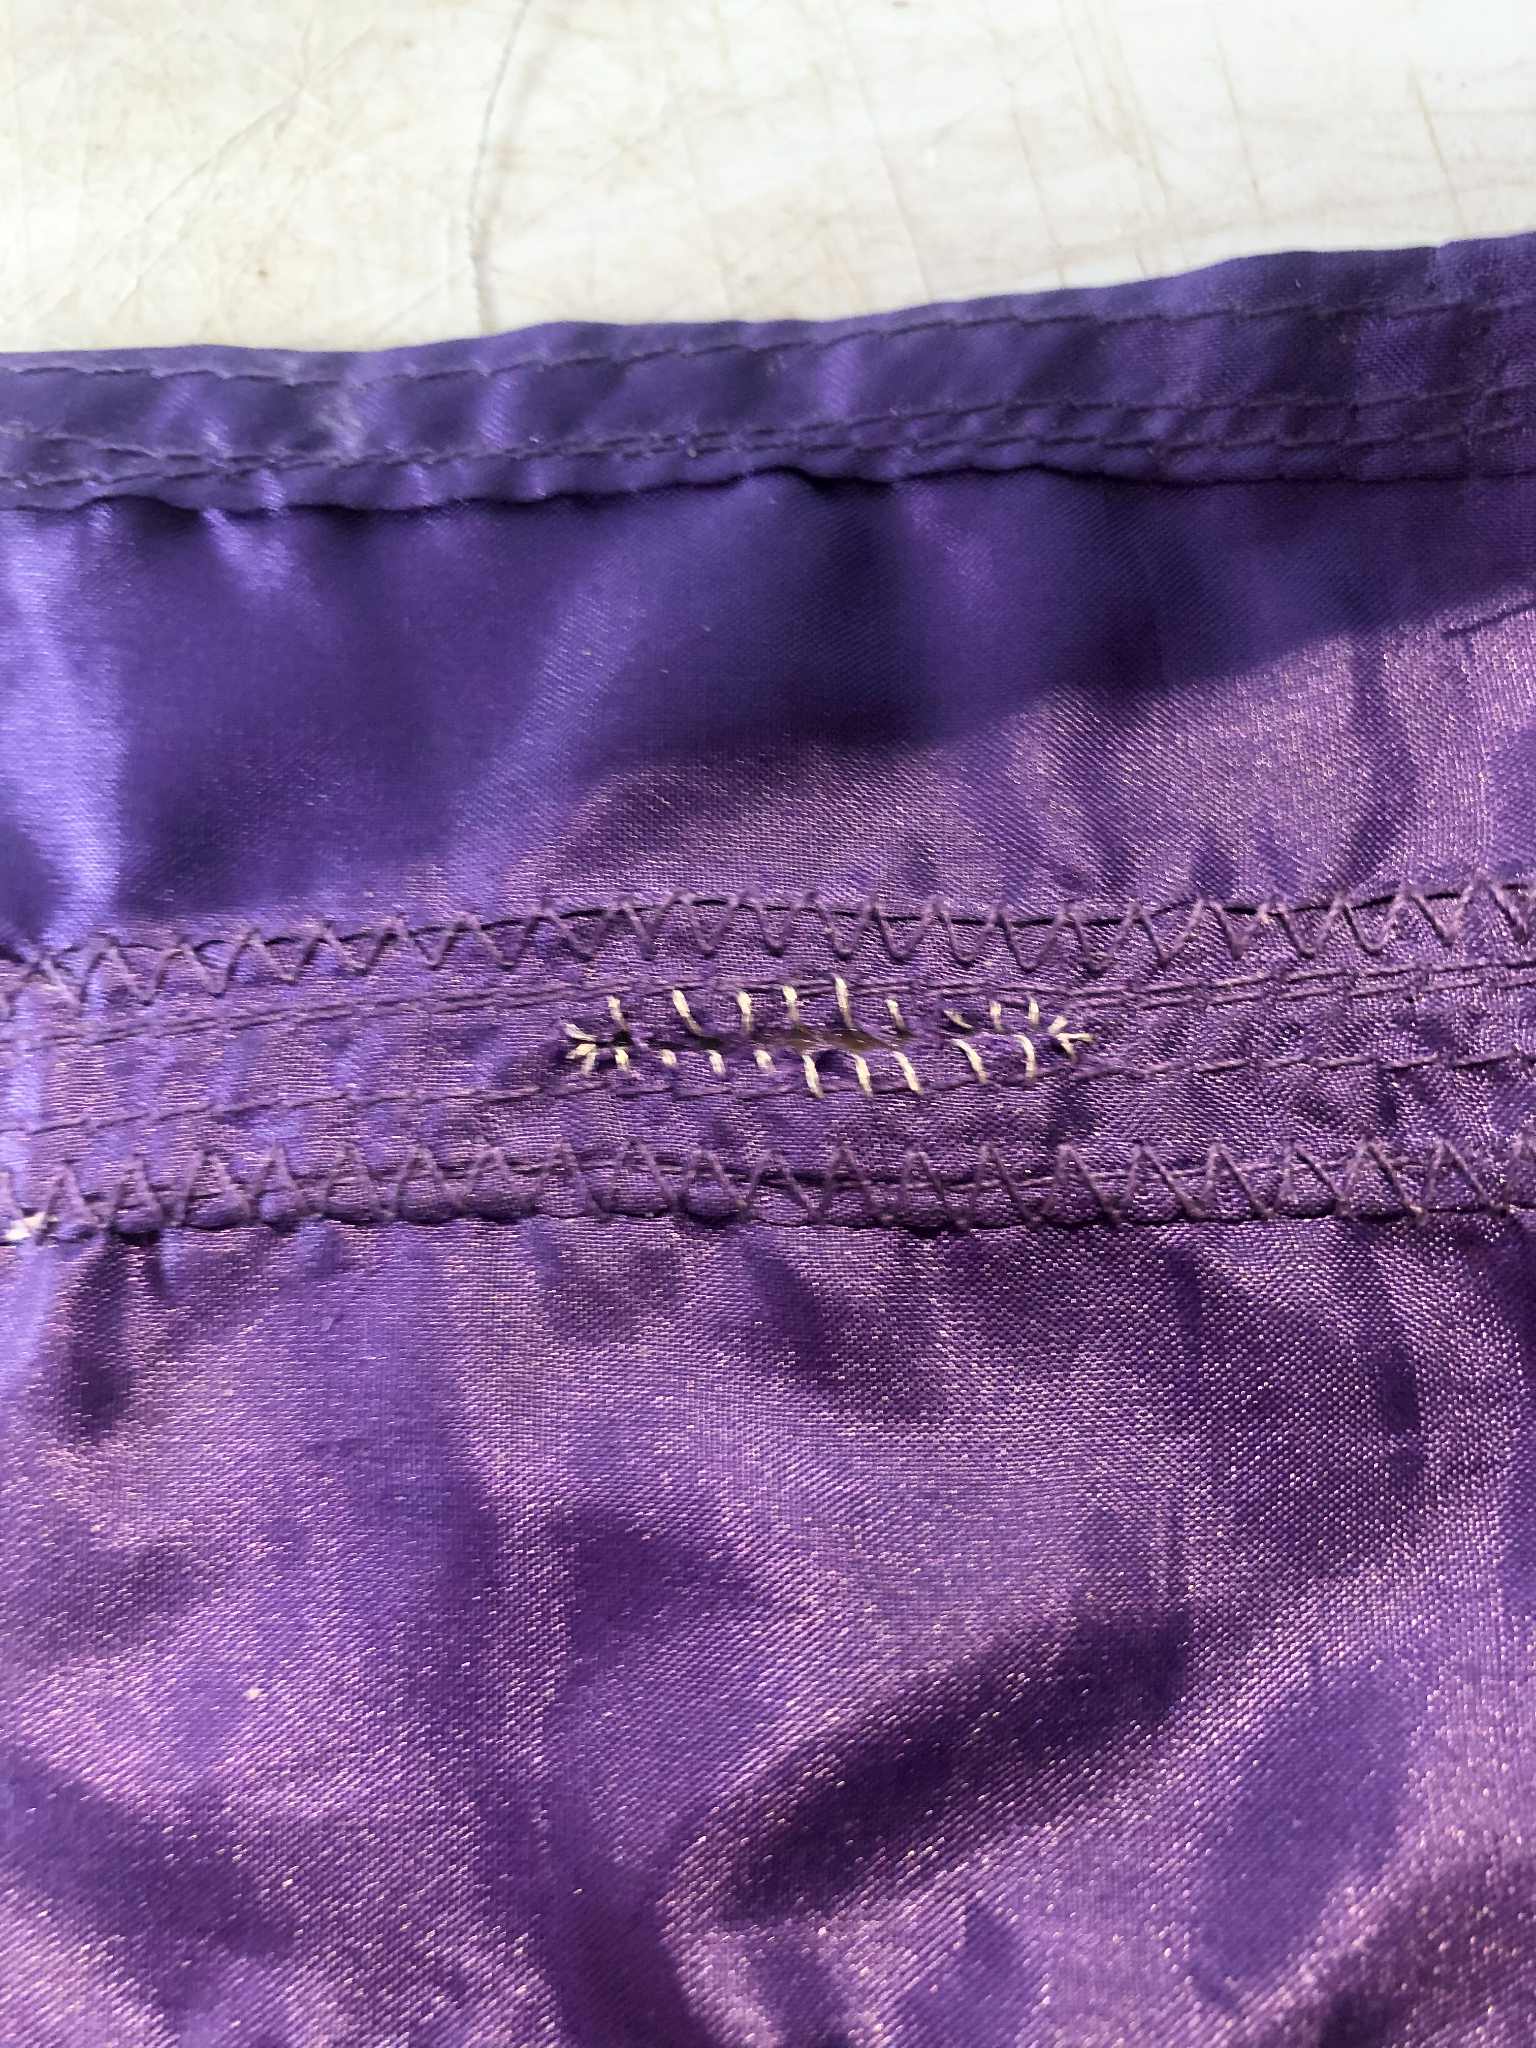
So the next several steps went quickly. After a failed attempt to use that same black fabric as the backing to make labels, which frays like mad and cannot be cut straight, I remembered that I had 2cm black ribbon, which worked a treat! I wrote labels for all of the pockets in sparkly silver fabric paint, which needs 24 hours to dry before ironing the back to set it, and in that 24 hours, we tied all of the coins to ribbon, secured the knots with that same purple thread zig-zagged back and forth through the knot (the hourglass-type gold coins and harbor moon extra-secured with braided fishing line tied tightly around the coin beneath the ribbon and through the knot to assist it), and sewed the correct lengths of ribbon for each pocket in a secure way to be able to take some tugging without issue. Before that though, we had made ribbon slits in the front of all of the pockets and secured them with unravelled silver embroidery thread (and a touch of glue around the mouth to hold further fraying back). To go the extra mile with the ribbons, I did a zig-zag stitch at the top so it wouldn't snag the deck when sliding them back into the pockets. And as much as I wanted to flip the harbor moon coin over to curve downwards, where the hole is it's meant to hang this way (also the design), and if I flipped it upside-down it would be frowning... and we can't have that!
So in the time it took to tie all of those coins on, and, k, lemme actually give you the steps I needed to go through to get these all sized up well, since all the pockets are different sizes. I'd tie the coin on, secure up the knot, then string that through the drawstring slit. I'd pack the pocket to the brim with decks to make sure the maximum possible length of ribbon is stretched into there (it's like 2mm longer with only the single deck in there, so no problems there, and we avoid it being too short), with the coin sitting at the right spot, taped the ribbon to the back into that place, removed all the decks, chalked a line across the ribbon and against the back a centimeter under the top of the pocket, the FINALLY cut off the ribbon from the spool a few centimeters past the chalk line, folded the ribbon at the chalk line and pinned it into place lined up with the matching chalk line on the back, did the sewing (in which the bottom line might look odd, but not really knowing where the folded-back end of the ribbon ends when doing the first line across the bottom, the twice-over would get right to the end. Also, I melted all of the ends of the ribbons to avoid fraying, of course), then once I did that for ALL the pockets, I went back and did the zig-zag stitch to smooth the top edge of the ribbon, hand-stitched all the front-threads to the back, taking that opportunity to go through the extreme tip of each ribbon-corner, and knotted the front and back threads together on the back. And then I dabbed just a touch of the wood glue to each knot to further secure them all (they were all double-square-knotted to begin with), and woot, done! So a full weekend!
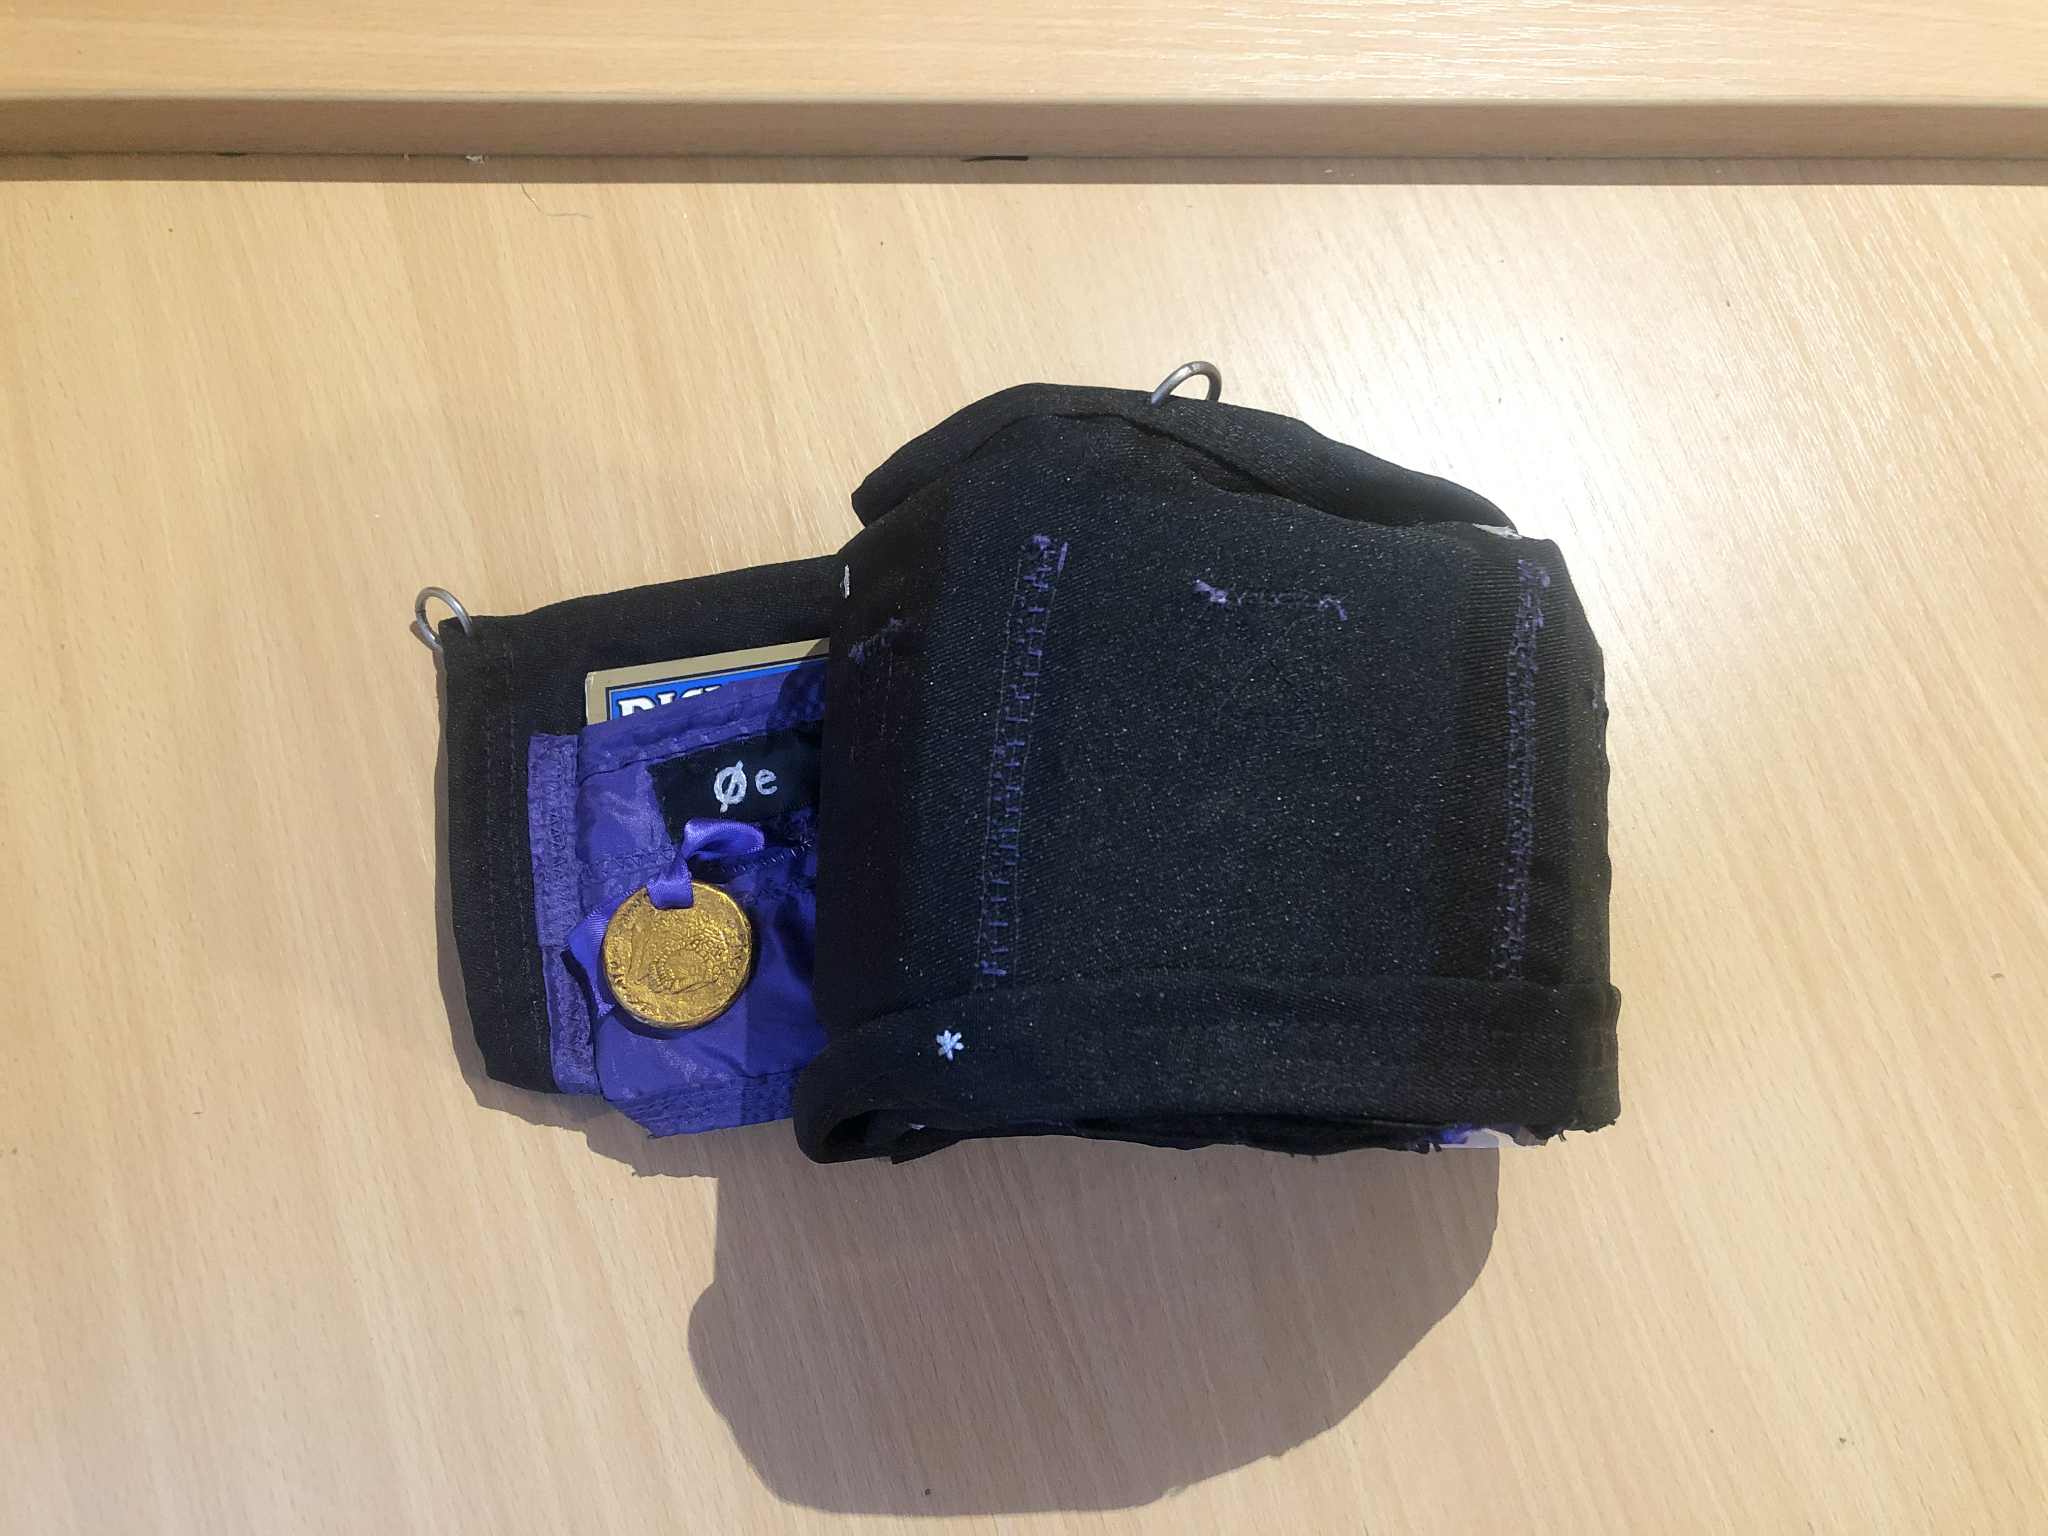
After all of that was attached, I "ironed" all of the labels, by... since I lack a clothing iron, or ironing board, I boiled a kettle of water, then used my leather gloves to press the back of each label to the side of the kettle. It's boiling water hot, an iron steams (though technically these should be ironed without steam, so I made sure the side was dry), it should suffice. And the leather gloves held back the heat from my hands nicely, though kinda getting stingy towards the end. I held them on, sliding them around for as long as I would have ironed them, 5-6 seconds, and called it a day. Almost literally, at that point I had been hunched over a sewing machine or needle for 12 hours straight, so I decided to get one label on to get me started for the next session, and finalized my thoughts to trapezoid the labels to give them a little bit of style. A simple patch-stitch type method fixed the first label on (for some reason I never like making the "first" bit the default top-left option, not sure why, feels to 'ugh' if you get me), and we were set to get the labels attached. We did however also take the time to add grommets of sorts along the top, less by making and securing holes, but by just stretch-opening enough of a hole to get some half-inch 12-gauge titanium rings in there, and crazy-gluing inside the seams of those to avoid snaggage as best I can.
And lo, the labels were attached! This happily went fairly quick, and the thread knots were tucked behind the labels. Following this was the last step, adding the little magical looking sparkles scattered over the sheet, generally all on the black fabric, but one on the purple just because, and the fight that ensued in trying to knot the thread while not have a snag on the inside of the fabric ensured there was only one lol. As a final step, we added a drop of glue on the back of each of the embroidery knots, and further clamped all of those between laminated pieces of fiberboard and a vice clamp to flatten them as the glue dried (it's knotted on the back, but I still don't want big knots back there either), and with that final step and minor glue cleanup afterwards, we were finally complete!!!! Far more weekends than I would have liked to have spent on this, but necessary it was, and complete it is! Now... would you like to draw a card, mweeeeehehehehehehehehehehehehehehe.
Finished October 21, 2025


