
General Instructions
|
One of the main points I'd like to make is... the colours are never going to be exactly as shown. No matter where you go, the bead selections are going to be different from somewhere else. One brand name's green is going to differ from another's, and so forth. To locate all the colours, I had to use a minimum of four different brand names, and to find lots of different shades, don't be scared to go after those multi-colour packs of beads. You can sort what you want out and give away or toss the rest. So the best advice I can give is to print out a colour copy of the pattern beforehand and bring it with you to the stores. Compare, and pick the best match. Basically, get as close to the original colour as possible. Secondly, the twine. What I use is just plain, 20lb test hemp twine. Nothing fancy, nothing special. There's coloured varieties available, which can add extra colour to the product. Use these to your liking if you wish. Lastly, the needle. I'm sure there's hemp-twine beading needles that you can buy, or if you go to a craft store, I'm sure you can find amazing ones if you have the money. I use none of these. What I use is a small wrap-tie (2mm wide), cut it off to about 5cm long, round the tip (if you don't use the end which is already rounded), and with a knife carefully cut a hole (about 1cm long) near the bottom to run the twine through. I then whittled the hole a bit to get it wider, so it's easier to slide the twine through. You can get wrap ties (also known as zip ties, cable ties, or tie wraps) for like... a penny each, so I'd probably suggest using these. |
The Curtain
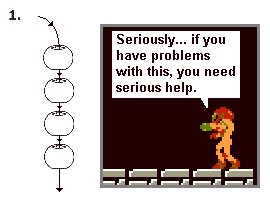
These instructions are very self-explanatory. The curtain is by far the simplest thing to make, albeit the most time-consuming by far. First things first... you probably want to print out the pattern, unless you don't mind staring at the computer screen to view it. But the beading method... cannot physically get any easier further than resorting to a single bead on a string. For this, you follow the pattern, stringing the correct colours in the correct order. This isn't exactly rocket science, but see the pattern page for more details. Once you get to the end of a strand, you tie the final bead to the BOTTOM end of the strand. |
 |
This step is essentially... putting it all together. The loose top end of each strand must be attached to something obviously. You can use pretty much anything you can come up with, but I suggest using a wooden dowel about 3.5 to 4 feet long (you can cut off the excess). Drill holes through it 10 millimeters apart, lining up all the holes parallel to eachother. String the loose end of the twine through it's respective hole, and tie adjacent strands together to keep it secure (ie: tie strand 1 to strand 2, strand 3 to strand 4, etc, etc). A double-knot should be more than enough. |
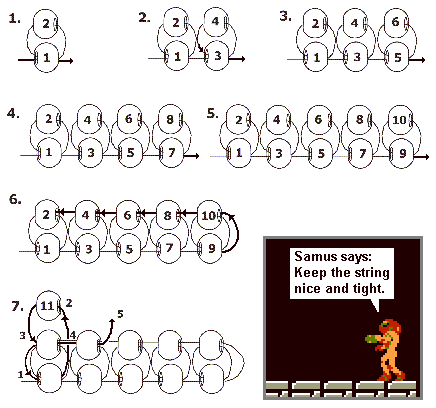 | As with the curtain, you probably want to print the pattern out before you begin. Otherwise, to begin beading any of the other items (placemat, hotplate, or coaster), the instructions are fairly simple. As long as you line up the colours correctly, the beginning of the project is fairly simple. Note the way the beads are numbered, as that's the order they're connected. You want to leave about 3 inches of slack twine before bead number 1, so that it can eventually be tied off when you've completed the entire thing. See below for how to tie off the ends. |
This is, if you're doing it correctly, the next challenge that you will come across. Since all of the items these instructions are for have rounded corners, you'll quickly come across a point where the second row of beads is supposed to go further left than the row below it. This is easily solved Essentially, you string onto the twine as many beads it goes past the row below it, plus one. For example, in the image to the left, the second row has 3 more beads. Once you string on four of them, the fourth and third last beads will be entwined together (as in step 2). Once you get to the third-row bead directly above the first first-row bead, you'll string down from row 3 to row 1, then loop that into row 2. Follow the arrows, listen to Samus, and you should get back to the point where you can once again follow Step 1. | 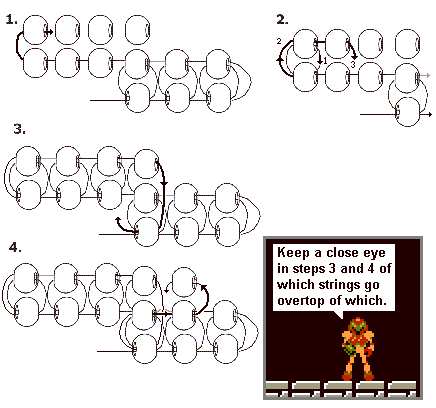 |
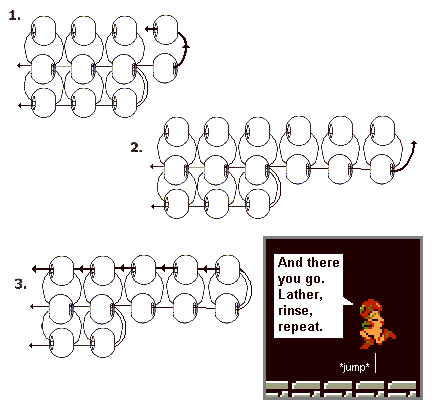 |
The next challange you will come across is the other side of the project. As with Step 2, with these your next row will contain more beads than the one below it. This is done quite easily, if you've managed to get this far correctly. Once you've hit the end of the bottom row, the rest of row 2 and 3 are made the same way as when you first began making the project. Once you've reached the second row's number of beads, you just string back through all of the beads in row 3, and you return back to Step 1. |
The final step really needs no visuals. Once you've completed adding all of the beads to the pattern, and have run the final string back through the very top row of beads, you are now at the point where you want to tie off the ends. What you want to do is run the end of the string back down through the row below it (or above it if you're doing the bottom) for about 4 or so beads, depending on how much room you have left on the twine. If you wish, you can run it from there down (or up if you're at the bottom again) a row and back through another several beads. From here, you just tie the end of the twine to any of the strands at that point. A simple single-knot will do, as there's really no chance of it being pulled out unless someone is specifically trying to tear it apart. Once you've tied the knot, cut off the slack (leaving about 2 millimeters of slack to avoid it untying simply due to lack of slack), and with a toothpick or anything small tuck the knot inside the last bead you ran through. This will both hide the knot and tie it off. As well, if you haven't done it already, you can tuck in any knots on the twine (assuming you use more than one piece of twine tied together) inside the nearest bead. This will keep it nice and neat looking. |
