
| Ok, so unlike the other failed attempt, I looked around and got word about JB Weld. It can withstand temperatures... without weakening... from -55 to over 250 degrees celcius (-67 to 500 fahrenheit), and has a tensile strength of 3,960 psi (somewhere close to high density polyethylene). And it bonds to ANYTHING. Well... a few rare exceptions, but I don't forsee me using this to bond pieces of rubber or lead or other bendy material together (although it works excellently on cloths, canvas, etc). Check this stuff out if you can find it, or look at it online. It takes a LONG time to solidify and harden completely (I just did one usage per day after work), but once you mix it and wait an hour or so, this is arguably the stickiest stuff I've ever encountered. Ever. I KNOW it's not about to un-attach from the cubies. Just rough up the surfaces for added strength. | 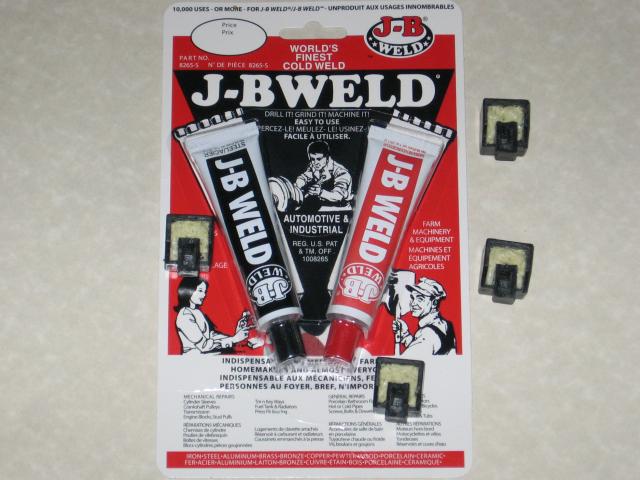 |
| From the previous picture, you can see that I 3/4 filled the cubies with a hard, foamy stuff so that I wouldn't both waste the JB Weld, or make the pieces weigh 5 times as much. The 'tab' holes I filled in entirely though. Here they are after the first epoxying and drying. Created corners for the two pieces, and filled in the others. It looks messy as hell right now, but that's what sanding, and permenant-markering will take care of later. | 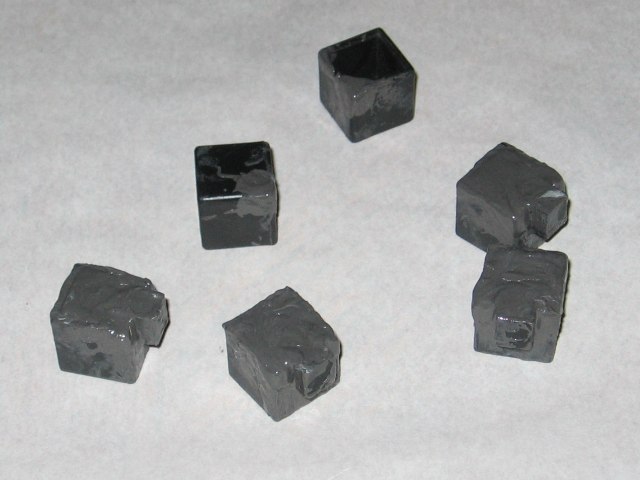 |
| And speaking of sanding... here's the first run over it with the file and sandpaper. Gotta say... this JB Weld takes longer to sand than the plastic of the cubie, so that's always a good sign towards its strength. I also flattened out some of the sides of the cubies that had an 'indent' due to either age or whatever from the original moulding process when it was made. Virtually invisible on the original cube to begin with, but I figured... eh, while I'm using this stuff. As well, since the tabs on the side-pieces were very small the last time, I decided to extend the tabs all the way across the cubie. Basically, it should triple the support and stability when turning the pieces. In theory at least. Only one way to find out! | 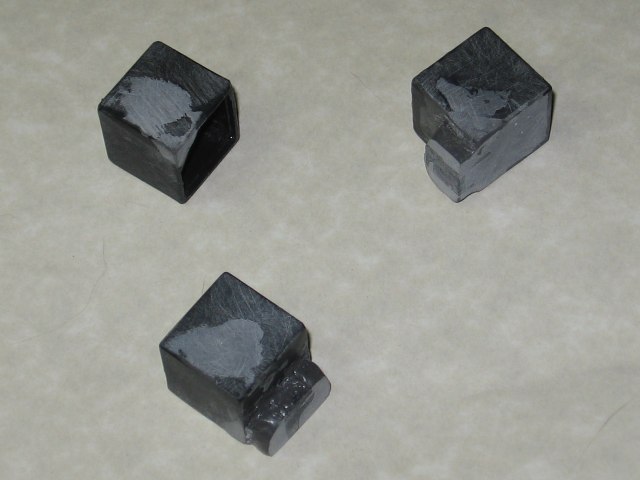 |
| So in order to file said enlarged tabs down to the correct size and shape, after a bit of hunting around I discovered that my ring tool pinky ring happened to be the exact size needed! So I essentially filed them down such that any piece can fit inside of the ring and turn nicely with any other piece. Gotta say, without this ring, I imagine this step would have been a hundred times harder. I'd have basically no way of easily testing to see if the tabs were the same, or slightly off, or slightly oval, or whatever. | 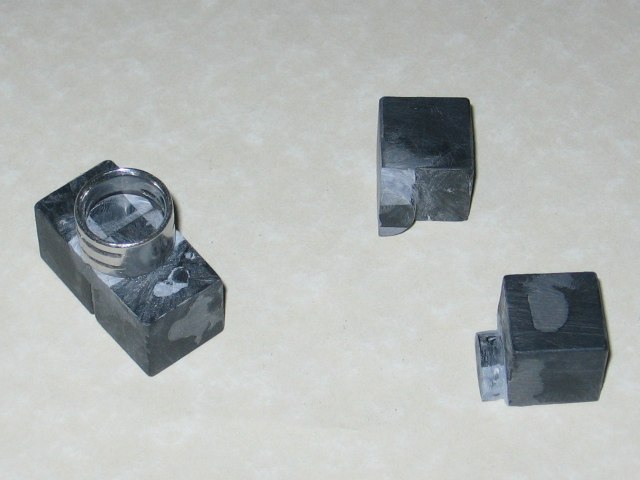 |
| And with a fair bit of effort, I managed to get the groove in the semicircle tabs to a good size and depth. This part took by far the longest, since a lot of it was trial and error, and I didn't have a file the right size to just be able to go nuts down the slot. I mostly used a hacksaw blade, sandpaper, and a sharp knife to slowly create the groove. I as well had to touch up the groove a lot over time from it being too wide or too deep. So that JB Weld came in handy yet again, with me managing to slither a thin layer where needed, or add it right at the seam to build it up again. These grooves... it took somewhere around a full 7-day week of me tweaking them, sawing, sanding, re-epoxying, etc to finally get them to fit the groove in the middle piece tightly. For the record, there's virtually zero wobble with these pieces now when you rotate the cube half-way around. I'm very pleased with how well these tabs turned out. | 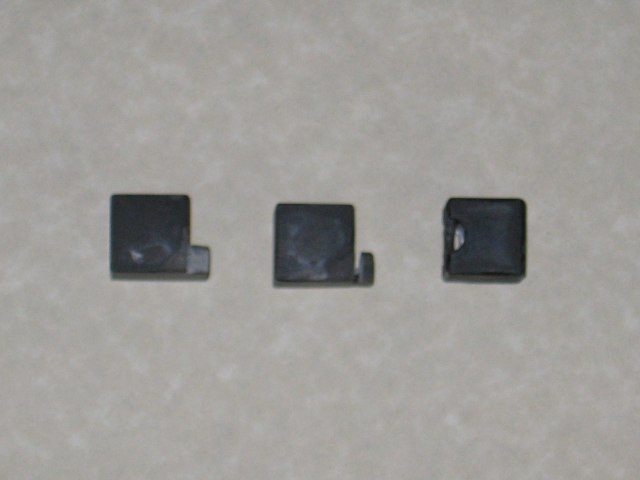 |
| Since I didn't want to just have the head of the bolt and the nut tightening directly against the plastic again like the last one, I decided washers would be needed. However, for the tiny size of bolt I was using, I didn't have any small enough washers for it. As well, I'd need a washer that had the right size hole AND wasn't too big around the outside so that it interfered with the tabs. Thus, I used the bottom of a tin can, drilled the right size holes in it, and then cut my own washers out of it. It's not like they need to be ludicrously strong... just enough to keep the springs from digging into the plastic. |  |
| That's right. I grabbed two springs from the center structure of the cannibalized Rubik's Cube for this. If a normal Rubik's Cube can have tension, why not this one? Here's how the spring/bolt/nut/washer arrangement will be on the inside. The washers nicely stop the 'end' of the spring wire from digging into the plastic and slowly wearing it down. Although I've discovered that twisting it still likes to screw or unscrew the nut... so my solution to that will end up being having two nuts on the end of the bolt, and tightening those against eachother. That should stop any problems that come up from THAT, and it'll still have a bit of spring to it. | 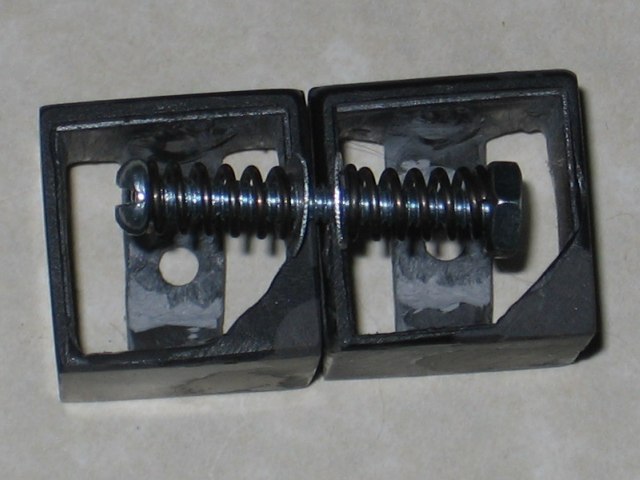 |
| Remember how I mentioned using permenant marker ove the grey sections from the JB Weld? Yyyyep, it's looking pretty good about now. You can somewhat see where the marker is and where the plastic is, but for one it's virtually invisible unless under close inspection. Secondly, it should wear down a bit over time and even out. Thirdly, the plastic will be 98% covered with the stickers anyway, so for all intents and purposes, it will do the job just fine. I markered the tab too, despite the fact that it would never be seen. Mainly just for completion sake, really. | 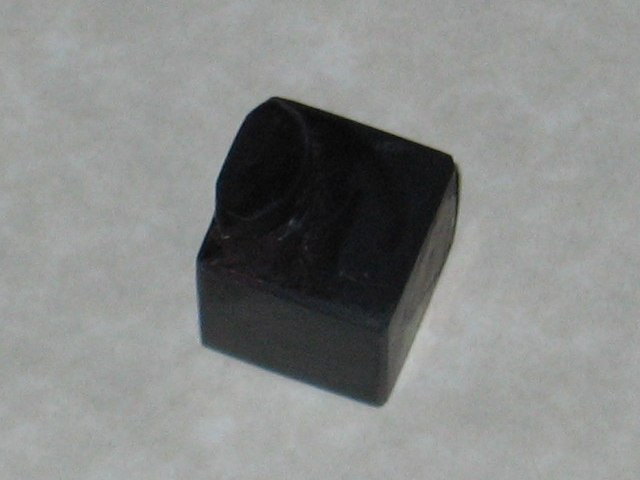 |
| This is what the inside of the middle piece looks like, prior to putting the cap on it. You can see the washer, spring, and bolt, and... ok, it's hard to tell this part, but they don't interfere with the tabs at all. As well, you'll notice the grey inside of here. I slathered some JB Weld down the side and across the corner where the strip of plastic is. Since that's where it broke on the last one, I figured adding some extra strength there can't help but be good. Again, doesn't interfere with the tabs, and is just some precautionary added strength and stability. | 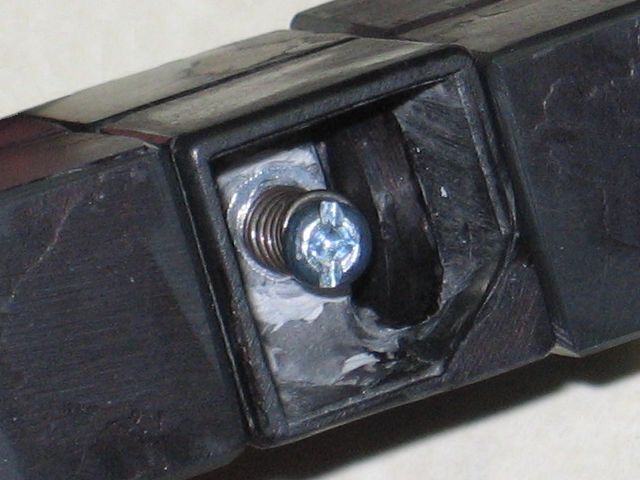 |
| And until I purchase new stickers from the Rubiks store online, I again just went with using the old stickers from the dismantled Rubik's Cube. Thus the 'old-looking' colour, bent-up corners on some of them, and dirt or nicks in the sticker. I plan to lubricate the pieces with silicone spray, but I'm waiting until after I attach the new, proper stickers. This will do for the meantime. The caps in the middle pieces will end up being glued on with just elmers glue, so that it'll be sturdy enough, but still easily removable if need be. All in all... at least 1000 times better than the first attempt :D. Methinks we have the final version. |  |
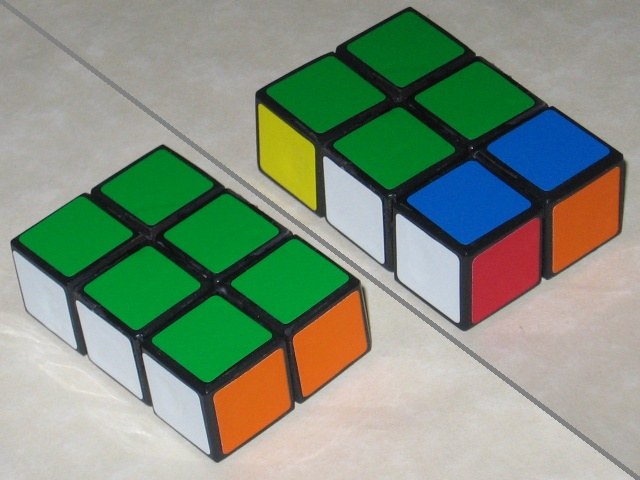
| I figured I would take one last picture of it after the replacement stickers came in the mail. I arranged the colours a bit differently. They're still oriented the same way as on a regular cube, but I just gave the blue and green colours the 'big' sides, since those are my favourite colours... especially in how vibrant the new stickers are. I've always liked how bright and clean the white looks, so that got the second biggest side, which gave yellow the other by default. And well... sucks to be red and orange... you guys should have stood out more in my mind. But yeah... looks excellent, and works like a charm. | |
