Well hello there, you seem to be interested in editing the game! Let me help you with that.
So, everything is an html file. There's the background images for like this index page, and then it's aaaall html files. So get your text editor ready.
First up, getting your bearings. Everything is arranged around a letter map. See the following map of our sample room:
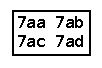
So, in a four-direction 3D space, each corner is going to have four views, two looking at the walls, and two looking into the room. The files for each of the rooms are named for the number and two letters of their corner, followed by the last letter of the direction that you are facing. For example, from the top-left, if you are looking to the right, the filename would be 7aab.html. If you were looking down, it would be 7aac.html. When looking at a wall, I use the same lettering system, but ending with a 'w' for wall. So from the top left, looking left at the wall, the file would be 7aabw.html, and looking up it would be 7aacw.html.

Using this, you can designate a separate filename for each direction of every square, while keeping the filenames small and understandable.
Let's hop in, shall we? I've built this room for you with words on all of the walls, so that it's easier to get your bearings when you're inside, and understand how things line up and connect.
Click here to wander around the sample room. Look for the secret(?) path to exit and return to this page.
Looked around? Cool, so you can see how everything is lined up, and mainly when you turn along a corner, how the lines for the boards on the wall follow. Here's a quick review:
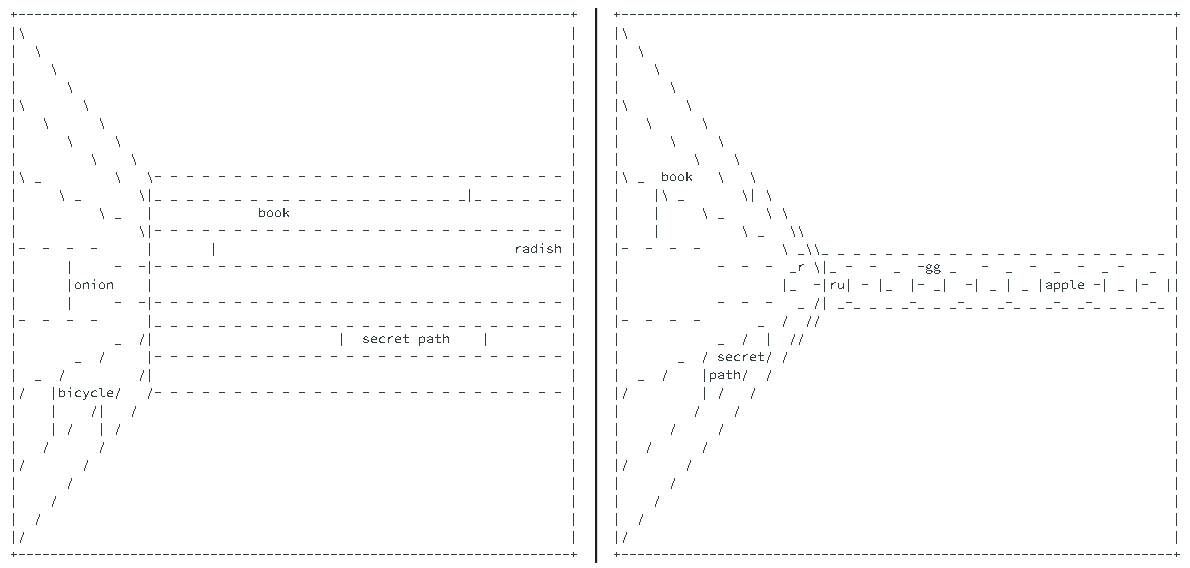
Yah, makes sense? Makes sense. Just be aware that, when adding items (as I'm sure you've seen in the game), our wonderful little ascii characters are about twice as tall as they are wide, so that somewhat limits our design options when drawing something from two different directions. You'll get the hang of it. Also using like 15 total keyboard characters lol, unless you want to start pulling in letters or other interesting things. Have fun with it!
Next up, how to tell where to make the screen clickable for down, left, right, forward, and sometimes up! Aside from clicking on objects (or boards like our secret path), how do you align where the cardinal directions change? Well, I've got both blank files for those, as well as a sample from our sample room.
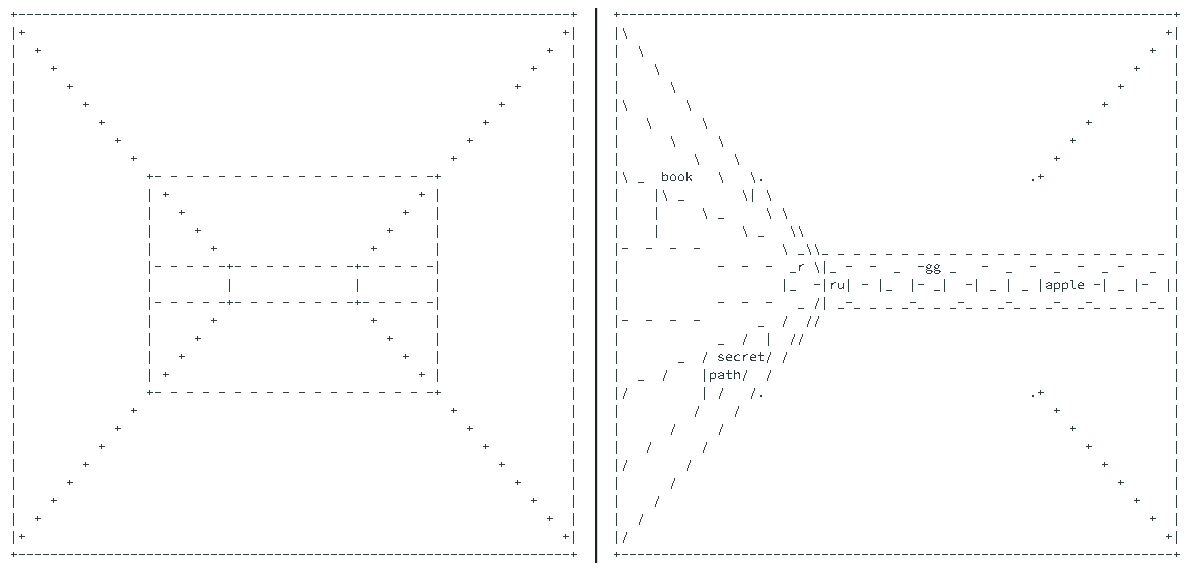
You can see how I use pluses to duplicate the top and bottoms of the walls all around the space, and periods in strategic spots to evenly split the screen into the five clickable directions. Next up, coding.

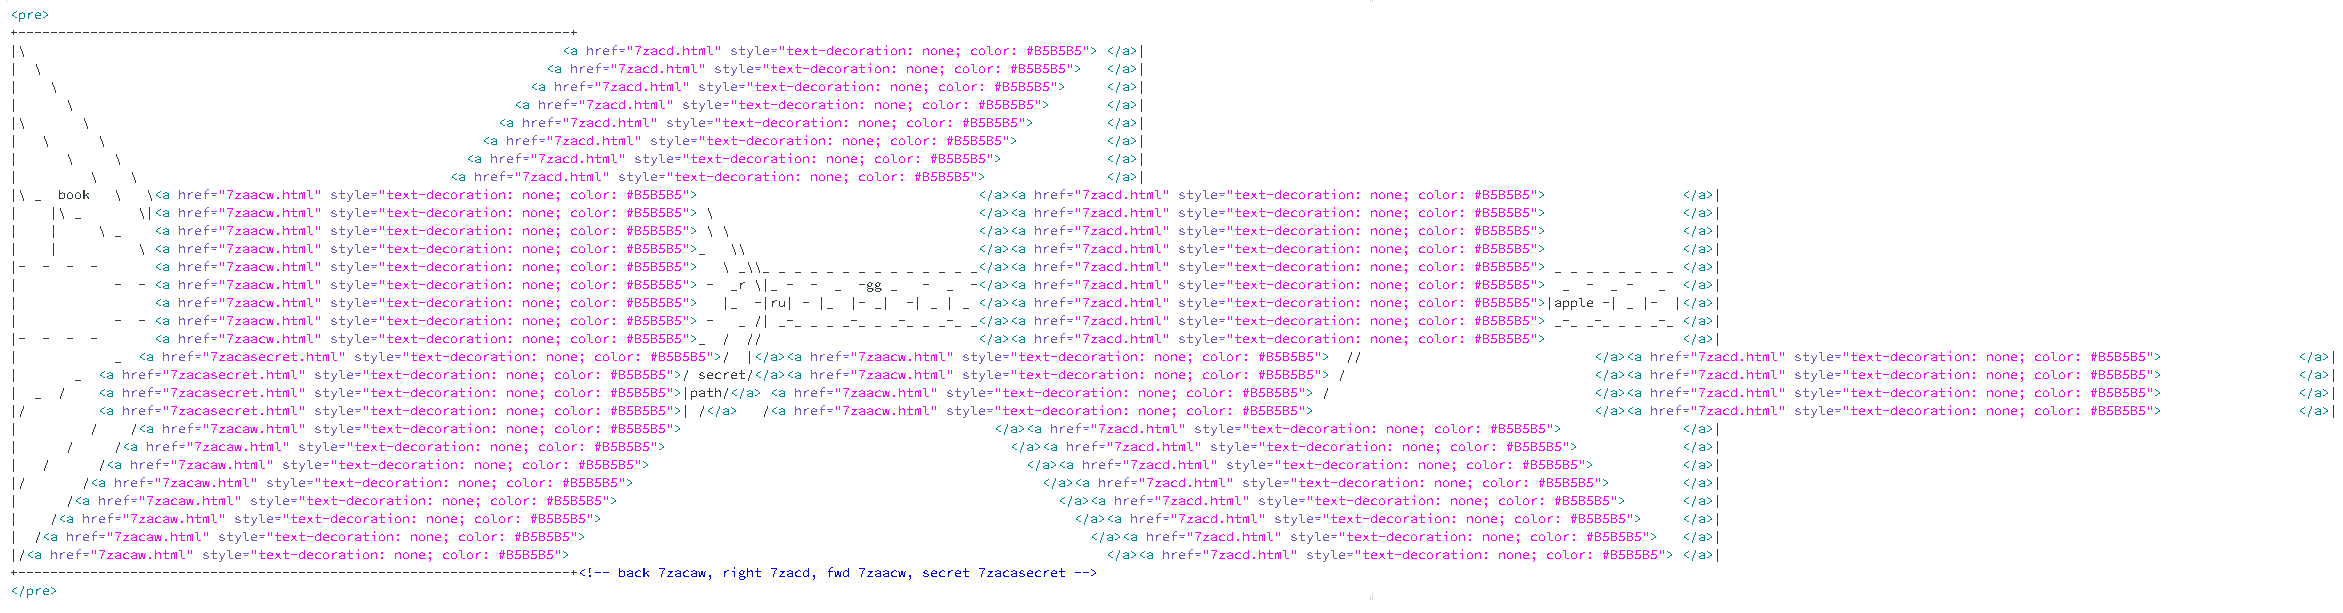
WOW, let's make that one clickable so you can actually view it. So yes, you can see it gets complicated. And that's a simple screen! But heeeere's the secret! Start from the right, and work your way left. See how there's a </a> on the far right of every line, just inside the screen border? You start with that, and then you copy and paste (get used to copying and pasting lol) the appropriate link code for the directions, objects, everything clickable, from the right to the left. Also, turn word wrap off.
And here's a tip. Your file will start with this at the bottom:

Which you will quickly convert to this:

Note how the </a> has been moved to the left of the <a href> code. I put it to the right initially, so that if I should accidentally forget the code in the file, then it cannot cause a problem, because it is opened and immediately closed code. But, you will want to move it to the left when you work on the file (and hopefully delete everything after </pre> when you're done), because you'll see from that gargantuan image above that like all of the <a href> tags, aside from the leftmost ones, are preceded by a </a> tag, so you'll want it on that side for the majority of your copying and pasting. This will save you a TON of time.
Do a search/replace in all files (open like 1000 at a time, my older computer could handle that without much issue) for "</pre><" when you're done, and that'll catch any stray code left over.
And otherwise, you begin with that file with all of the plusses in it, copy and paste the code with the appropriate filename from the right to the left, until you've tagged everything clickable on the screen.
*whew*, there we go, that's the brunt of it. Everything else will fall into place as you progress, ascii-draw to your heart's content, make doors, hallways, everything that you need.
Speaking of, we need the blank files! I have supplied both un-coded versions of all of the sample room screens, as well as all of the completely blank files that I used when making the game!
Please click here for all of the blank files
Open it in a new tab if you want to bounce back and forth between the help images and the file list.
As a final added tip, when making the game, when looking straight at the wall, I adjusted the boards on different floors so that rows are different heights, to make the floors look different, and to add to the mildly unsettling feel of the game. Also it makes a slight bit of sense, as commercial machinery would not have been available at the time of the windmill's construction.
And otherwise, enjoy! :D :D :D
|